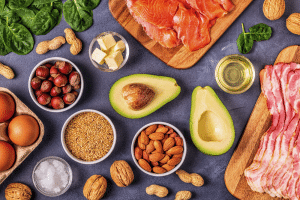
Do you love to cook (and eat?). Do your friends come to you for restaurant recommendations? Do you have the dish on the trendiest dinnerware and kitchen gadgets? If the answer to any of these questions is yes, then maybe you should consider starting a food blog!
Blogging is a fun way to share your expertise with the world, and if you put some effort into it, it can even bring in passive income. Here’s a quick guide on how to start a food blog.
Step 1: Pinpoint Your Passion
There are many different kinds of food blogs out there—blogs that post one-of-a-kind recipes, blogs that review restaurants, and blogs that spotlight local food issues are just a few of the different types. Which type excites you?
You’re going to captivate future readers by bringing unique insight to a specific niche in the food industry. Some readers might be really interested in a blog spotlighting vegan food, for example, but those same readers might not love content about restaurants in New York. That’s why it’s good to have a focused scope of content that will appeal to your diehard readers with every post.
Step 2: Name Your Blog
It’s not quite as much pressure as naming a baby, but…it’s pretty close. Try and think of a name that’s unique and descriptive. Think back to the niche you identified in step 1. If your blog is highlighting vegan food, like the example above, you might want “vegan” in the blog name. If your blog is focusing on local food, then the name of your state or city would be great to add.
Whatever you decide, make it to the point, easy to spell, and descriptive, so potential readers will want to click on it. Once you’ve come up with a name you love, check to make sure it’s not already taken.
Step 3: Choose Your Web Host
Every website needs a web “host” which houses your site on the internet. This host gives you access to your domain name (the name of your blog). Some common web hosting providers are GoDaddy and Bluehost.
You’ll have to pay a monthly fee to host your website online. Think of it like renting a room on the internet for your site to live. You might also have to pay to register your domain name, although some web hosting providers throw in the domain name for free when you host your site with them.
Step 4: Select a Blogging Platform
Next, you’ll want to choose which blogging platform to post on. This is the behind-the-scenes website that will actually display your site. Some common platforms are WordPress and SquareSpace.
Blogging platforms vary based on price, ease of use, and customization capabilities. Browse the options out there and choose the platform that you’ll feel most comfortable using.
Step 5: Customize Your Site
Now comes the fun part—creating your unique site! Depending on which blogging platform you choose, you’ll have tons of premade themes to choose from. If you are a technology pro, you can even customize your chosen theme to better reflect the personality and tone of your food blog.
Pro tip: Food blog readers probably don’t want to just read about food, they want to see it! To really get your readers drooling, choose a theme that’s pretty image heavy. This way, you’ll be able to add photos of all your yummy dishes.
Step 6: Start Creating Content
Now that your site has been created, it’s time to start filling it with content. Try and plan out content a few weeks or months in advance, so you’ll have a backlog of engaging posts planned no matter how busy you get.
Well, there you have it! If you’re into food, then don’t let intimidation stop you from trying to start a food blog. The setup is quick and easy, so get started today—before you know it, your recipes could be shared all over the world!